Proxmox Virtual Environment is an open-source server virtualization environment. It is a Debian-based Linux distribution with a modified Ubuntu LTS kernel and allows deployment and management of virtual machines and containers.
Backups are a requirement for any sensible IT deployment, and Proxmox VE provides a fully integrated solution, using the capabilities of each storage and each guest system type. This allows the system administrator to fine tune via the mode option between consistency of the backups and downtime of the guest system.
Proxmox VE backups are always full backups – containing the VM/CT configuration and all data. Backups can be started via the GUI or via the vzdump command line tool.
Step 1: Add a SATA/SSD Drive in your server.
Step 2: Then Format that disk in ext4 format.
# mkfs.ext4 /dev/sd?NOTE: BACKUP ONLY WORKS, WHEN DISK, TYPE IS “ext4”

Step 3: Then Create a directory where you can mount that disk, and enter the parameters in
# mkdir /backup# vi /etc/fstab# /dev/sd? /backup ext4 defaults 0 0# mount -a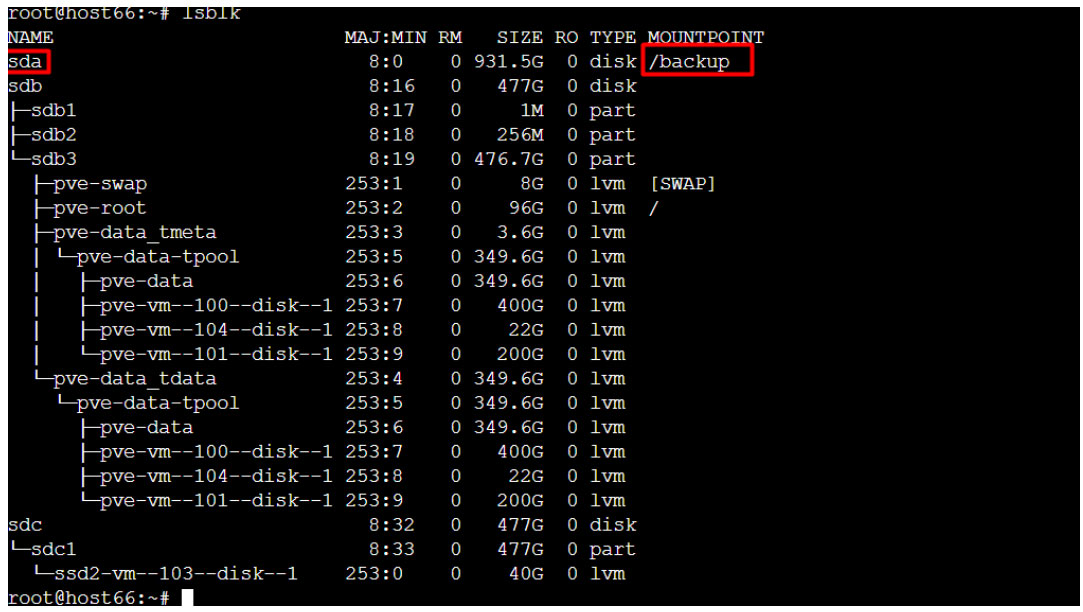
Step 4: Then run below commands to check the properties of your disk.
# lsblk# blkidStep 5: Then Open the Proxmox on your preferred browser.
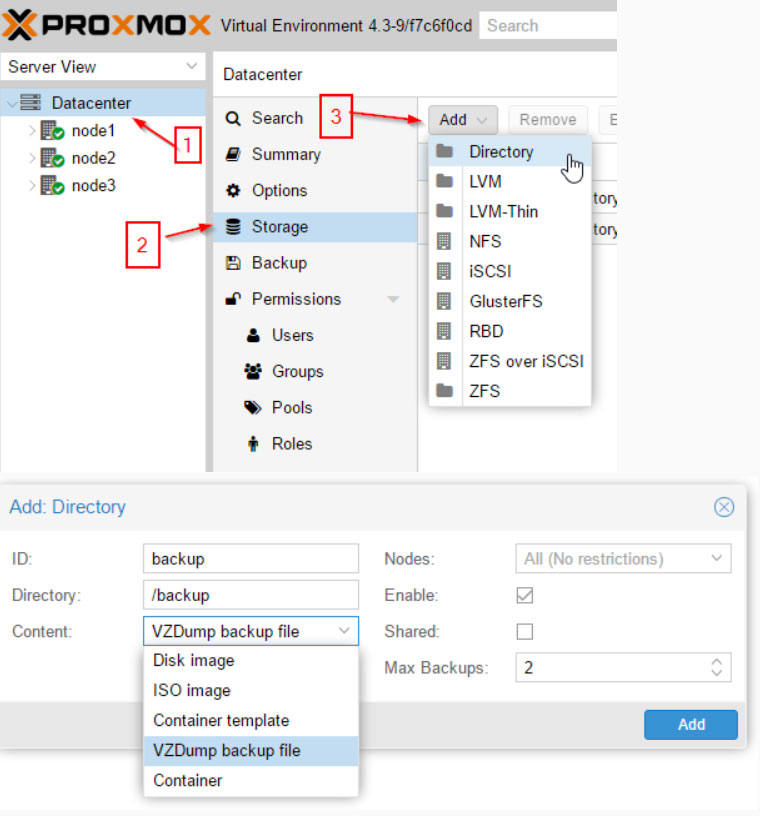
Step 5.1: Go to Datacenter
Step 5.2: then in Storage
Step 5.3: then click
Step 5.4: In Storage select its type VZDump Backup and enter the directory where you have mounted that disk, and select the retention, according to your need and then select your host and add the storage.
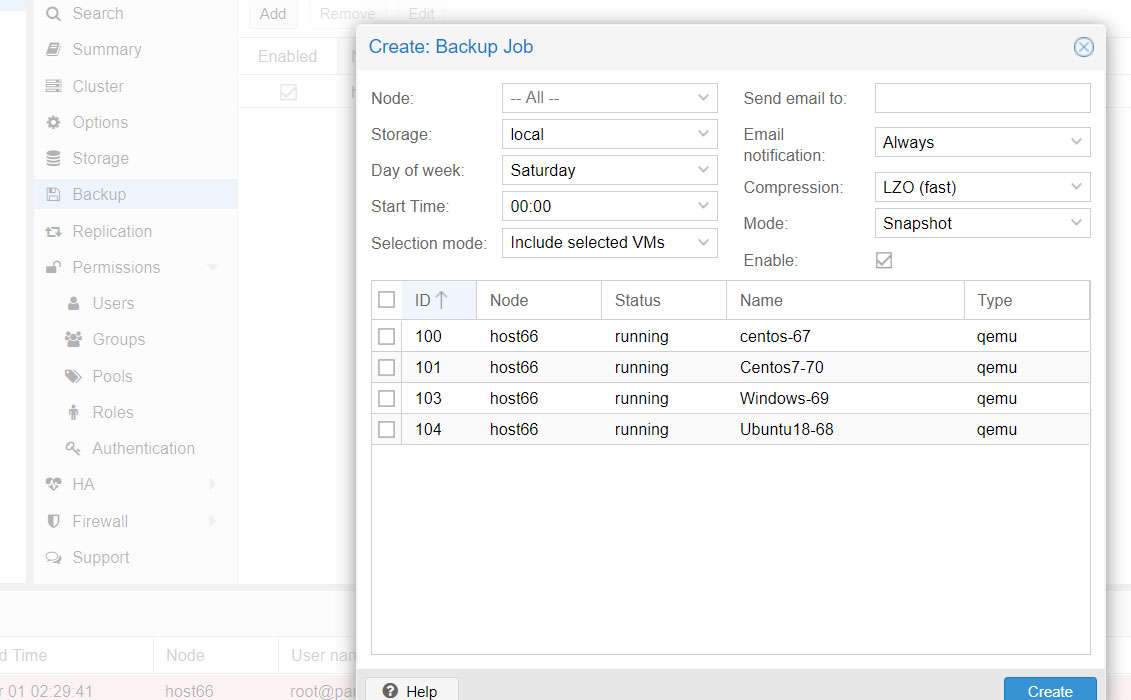
Step 5.5: Then in Datacenter go to backup then add the same storage that you add in backup part, configure according to your need, and click add.
Step 5.6: According to your Configuration your backup will automatically start.
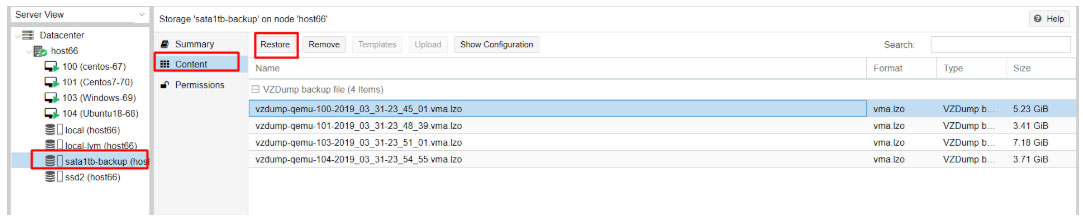
Step 5.7: Now if you want to restore the backup, go to
Step 5.8: Then go to the content there you can see the list of backups that you have created from there choose your preferred backup and click on the restore button
Step 5.9: That’s it, your VPS is new as it was. Enjoy.

Leave a Reply